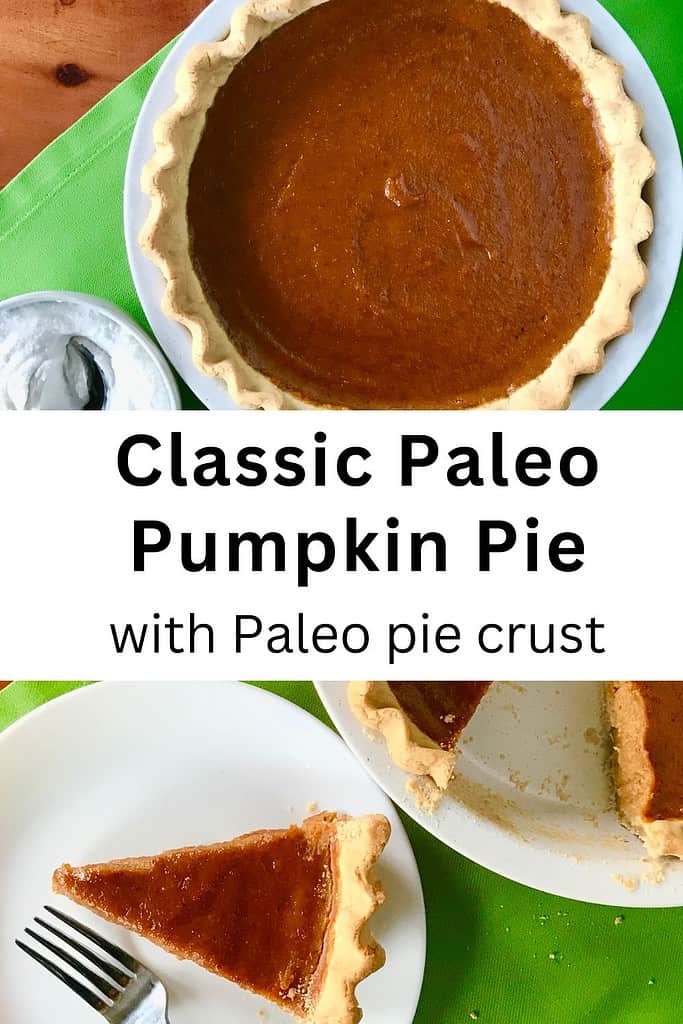
This Paleo Pumpkin Pie with a Paleo pie crust is the perfect holiday dessert! A crisp, grain-free crust is filled with a smooth, creamy pumpkin custard that the whole family will love.
Plus it’s dairy-free, gluten-free, grain-free, refined sugar-free and nut-free!
(As an Amazon Associate, I earn from qualifying purchases. Some of the links on this page may be affiliate links. If you purchase a product through an affiliate link, I’ll automatically receive a small commission at no additional cost to you.)
Paleo pumpkin pie = healthy pumpkin pie
Well, healthier.
This version uses maple syrup instead of refined sugar, and we’re using less of it than most recipes call for. Add the healthy fats of coconut milk and eggs, plus real pumpkin puree, and you’ve got one tasty, healthy-ish, allergen-free pie.
Plus all your favorite spices are mixed in, giving you the classic pumpkin pie taste.
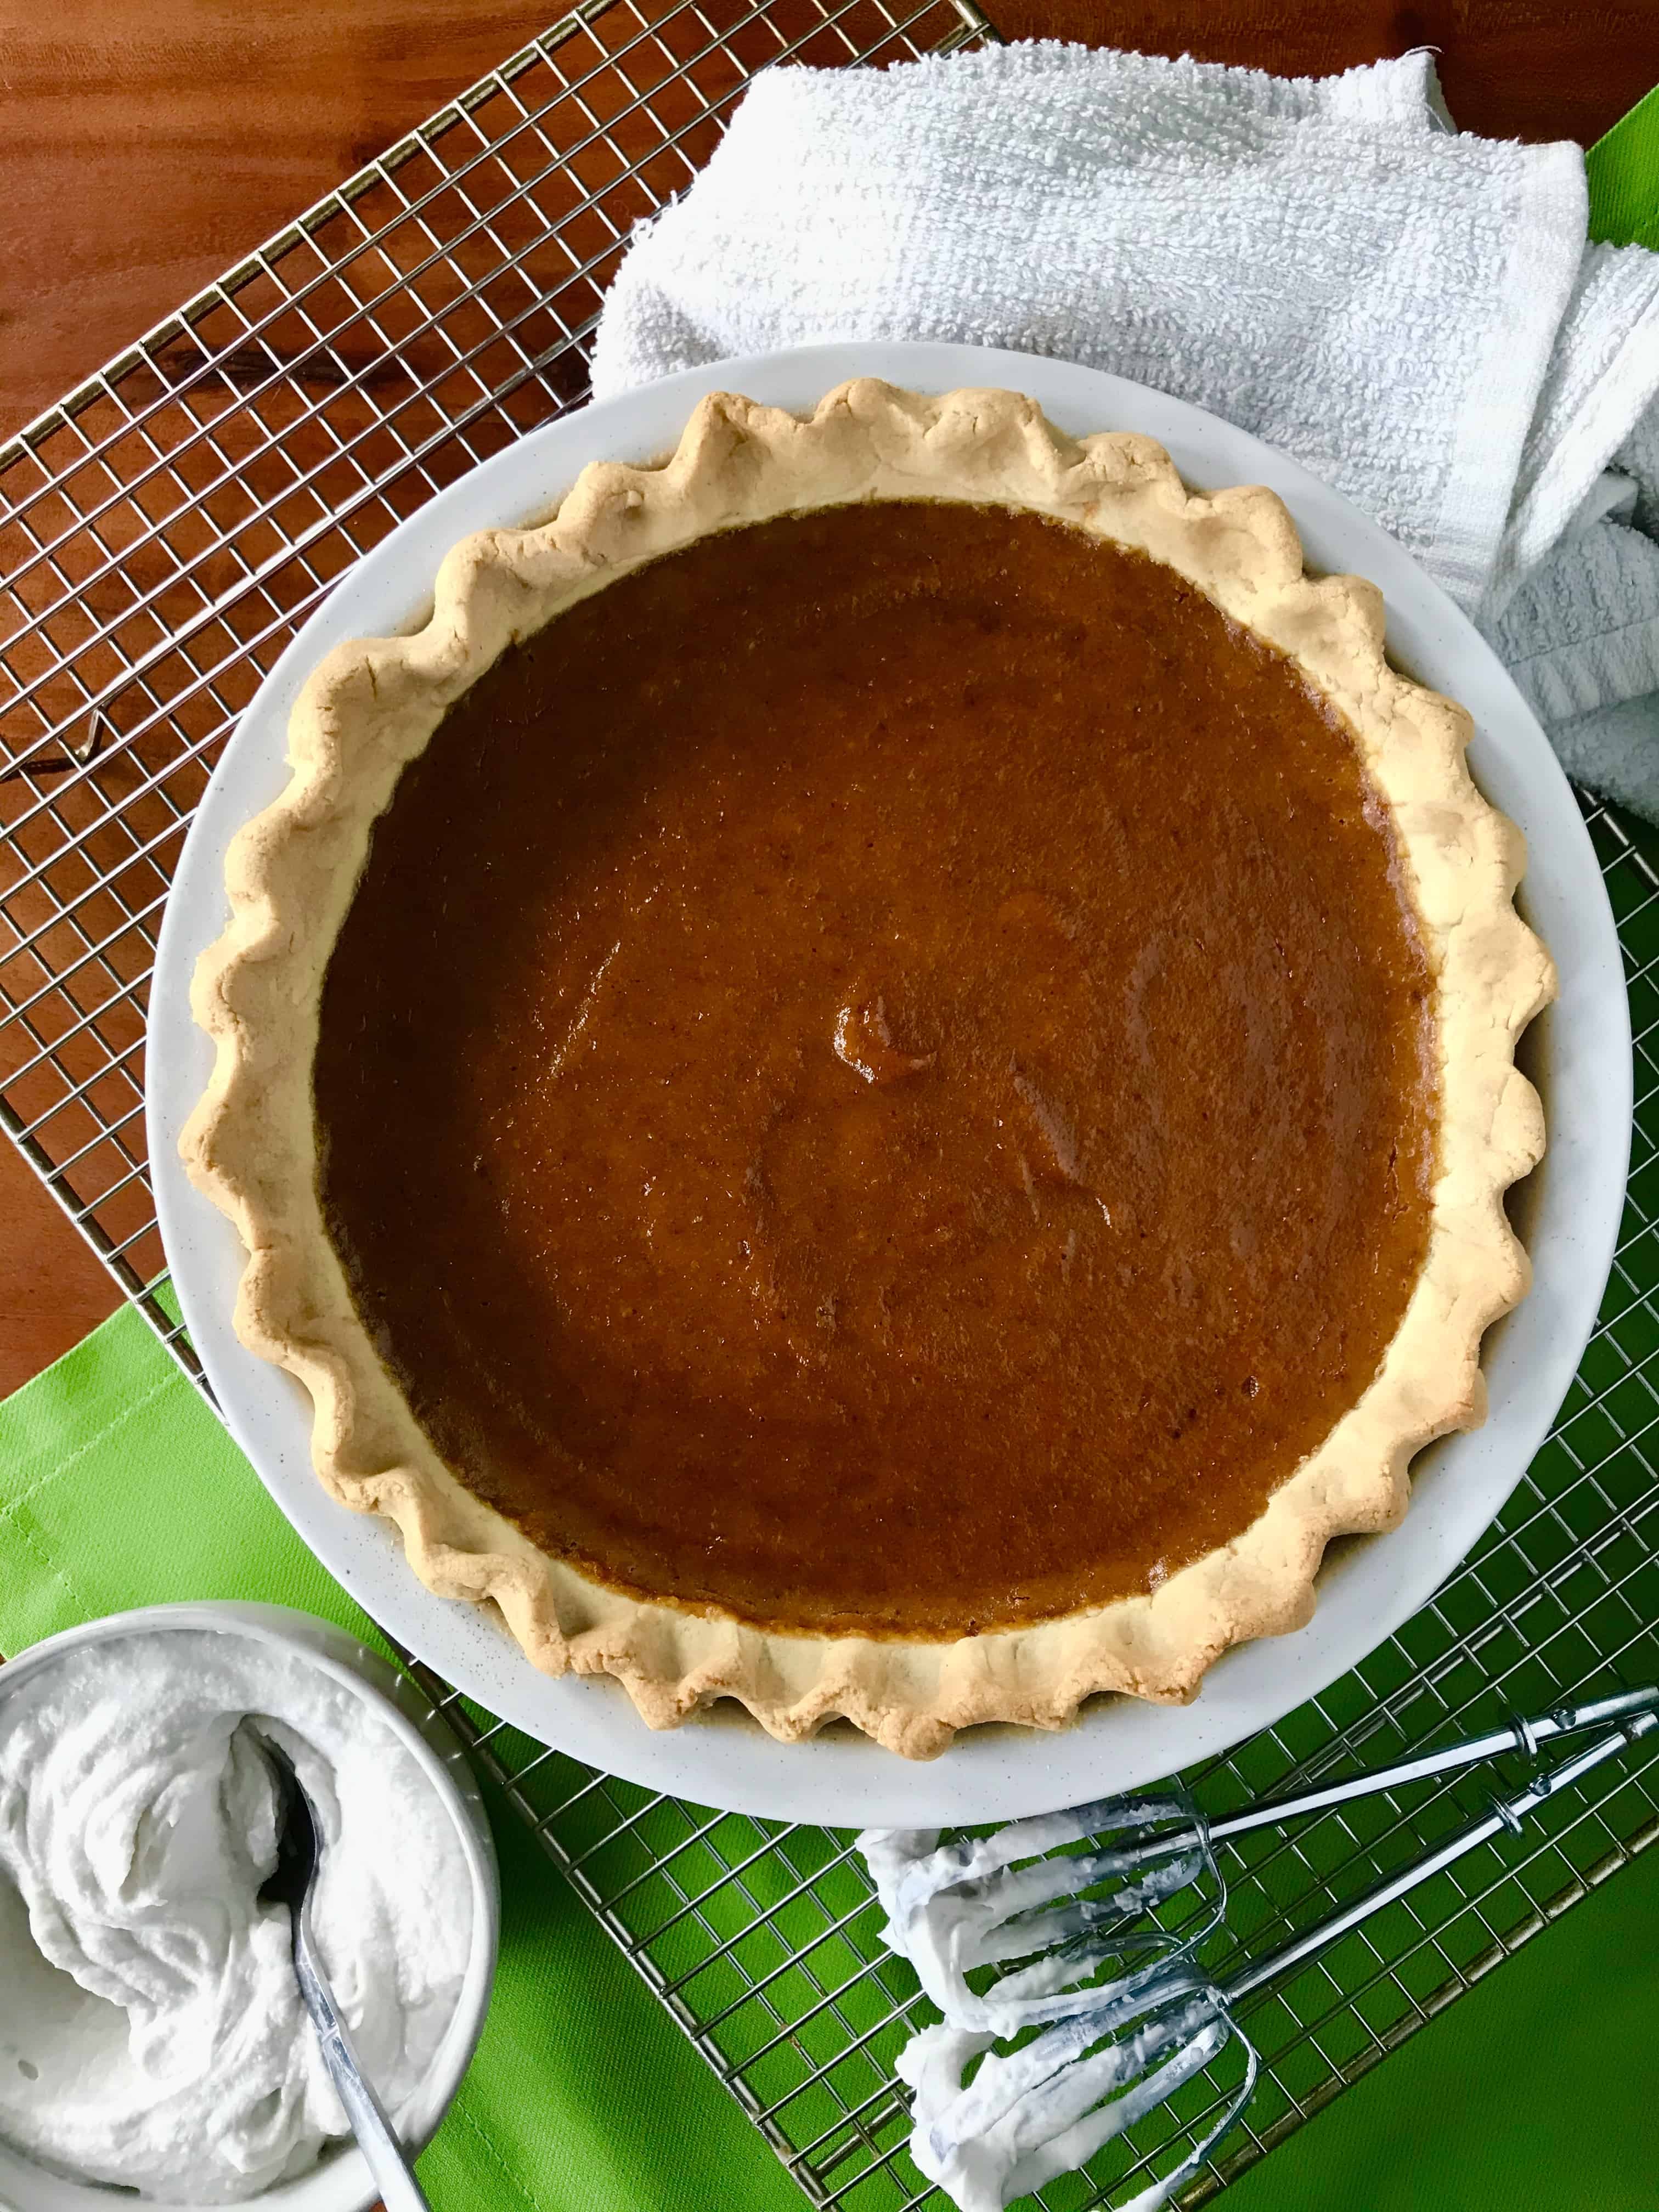
All of this luscious, creamy goodness is coddled within a crisp, flaky, grain-free pie shell.
Serve it warm, room temperature or cold. No matter which way, this will be a hit at your Thanksgiving.
A cassava flour pie crust
Not only are we swapping out refined flours, we’re not using the typical paleo ingredients of almond flour or coconut flour. So now we have a grain-free pie crust that’s also nut-free so no one is left out!
Cassava root (also sometimes called yuca) is a starchy tuber that is peeled, dried and ground into a soft powder remarkably like flour.
Since it’s grain-free, it has become more popular in the Paleo/gluten-free baking world so cassava flour recipes are popping up more frequently. I’ve had good results using Otto’s cassava flour and Bob’s Red Mill cassava flour.
It’s often used as a 1:1 substitute for all-purpose flour but here I’m also adding arrowroot flour. Arrowroot is the flavorless starch extracted from the arrowroot plant. It’s similar to cornstarch.
You can learn more about arrowroot flour (sometimes called arrowroot starch) and its place in Paleo baking/cooking here. I like Bob’s Red Mill arrowroot flour.
Together, these two flours/starches provide a flaky, sturdy crust.
This cassava flour pie crust is so versatile you can use it for many other pies besides pumpkin.
What you need
Ingredients for the Paleo pie crust:
- 1 cup + 2 tablespoons cassava flour, plus more for rolling out the dough
- 1 large egg, room temperature
- 2 tablespoons pure maple syrup, room temperature
- 2-4 tablespoons room temperature water, depending on how much is needed
- 1/2 cup arrowroot flour/starch
- 1/2 teaspoon fine sea salt
- 1/2 cup palm shortening, chilled
While usually you want all your crust ingredients cold, in this case only the shortening should be cold. If everything is cold the crust will be too stiff and crack more easily. So the other ingredients should be at room temperature.
Ingredients for the Paleo pumpkin pie filling:
- 1 (15 oz.) can pumpkin puree (not pumpkin pie filling)
- 2 large eggs
- 1 large egg yolk
- 1/2 cup pure maple syrup
- 1/3 cup full-fat unsweetened coconut milk (with the water and cream well blended)
- 1 1/4 teaspoons maple extract
- 3/4 teaspoon ground ginger
- 1/2 teaspoon fine sea salt
- 1/4 teaspoon ground cloves
- 1/4 teaspoon ground nutmeg
Equipment for the crust:
- parchment paper
- a large cutting board
- a large mixing bowl
- a small mixing bowl
- a pastry cutter
- measuring spoons
- measuring cups
- a whisk or fork
- a rolling pin
- a pie dish – I prefer using a ceramic pie dish like this one. Metal ones are too thin and can cook the crust faster than you’d like. Glass is also okay but I worry about glass (even when tempered) going from the fridge to the oven, as temperature changes could cause it to crack.
- pie weights – If you don’t have them you can just use dried beans or even dry pasta. You can’t cook with either once you’ve used them for this but you can store them to use for future crusts.
Equipment for the filling:
- a large mixing bowl
- a whisk
- measuring spoons
- measuring cups
- a can opener
- a spatula (the kind for stirring, not flipping)
How to make Paleo Pumpkin Pie (with step-by-step photos)
Don’t be intimidated by the long instructions. I’m just trying to be as detailed as possible. It takes longer to explain how to do it than to actually do it!
First, make the cassava flour pie crust:
Step 1: Cover a large cutting board with parchment paper and sprinkle cassava flour over the parchment.
Step 2: In a small bowl, whisk the egg and maple syrup together. Fill a measuring cup with the water. Set both aside.
Step 3: Whisk together the 1 cup and 2 tablespoons cassava flour, the arrowroot flour and the salt in a large bowl.
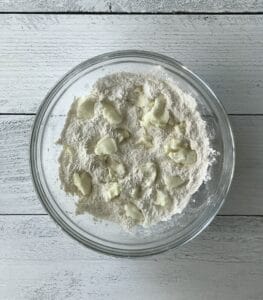
Step 4: Cut the chilled palm shortening into 1/2″ pieces and add to the flours. Use your a pastry cutter (recommended) or your fingers to grind the shortening into the flour, breaking it down into smaller bits that are coated in flour. Since it’s cold, you might need to use both hands to smoosh down the bigger pieces. You should have pea-sized pieces and smaller bits.
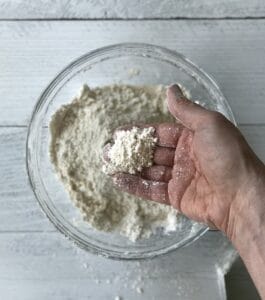
Step 5: Add the whisked egg and maple syrup and use your hands or a silicone spatula to squeeze and knead the egg mixture into the dough.
Step 6: Add 2 tablespoons of water and squeeze and knead the dough to incorporate the water. If necessary, keep adding the water, 1 tablespoon at a time, until the dough starts to come together. You’re looking for something like play dough but still with just a few crumbs. If it’s really sticky, add more cassava and arrowroot, 1 tablespoon each at a time, until it becomes more like play dough.
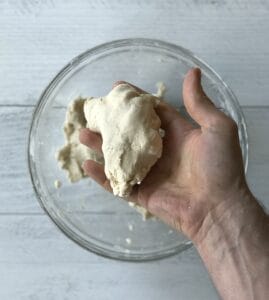
Step 7: Plop the dough (technical term) onto the floured parchment and press into a disc roughly 1″ thick. Sprinkle on a bit more cassava flour and cover with another layer of parchment. (To wash your hands, use soap and the hottest water you can stand.)
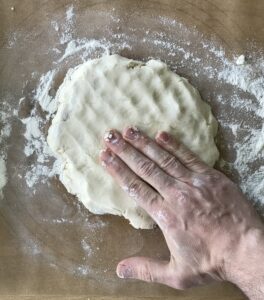
Step 8: Roll out the dough until it’s an approximately 12″ circle. Start with the rolling pin in the center of the dough. Pressing gently, roll it away from you, then lift it back to the center to roll it toward yourself, the center and to the left, the center and to the right, and then the center and out diagonally into all 4 corners. Repeat the process until it’s the right size.
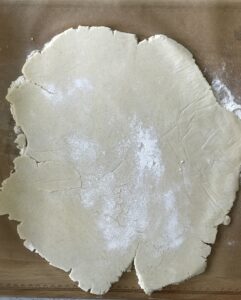
Step 9: Carefully peel off the top layer of parchment. With your pie dish nearby, carefully slide your hand under the bottom parchment layer and quickly flip the dough over the pie dish, keeping it centered as much as possible. Carefully peel off the parchment. The dough might crack and break but that’s okay! Gently raise the edges and tuck the dough down along the sides into the bottom. Use your fingers to pinch and press together any cracks. If you find that your fingers are sticking to and ripping the dough, fill a glass with warm water and dip your fingers in and then gently dry them so they’re just damp.
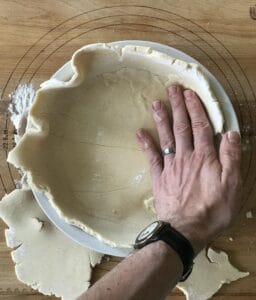
Step 10: Pull off any large pieces hanging over the rim of the dish. Use the extra pieces to create a tall, thick layer around the edge of the rim (the dough will shrink a bit as it cools/bakes). You might not need all the dough. If you want, create a fluted edge by using one index finger to press the dough between the index finger and thumb of the other hand.
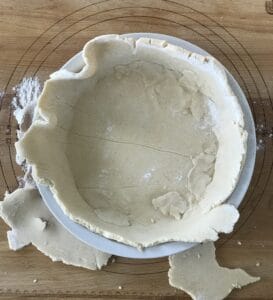
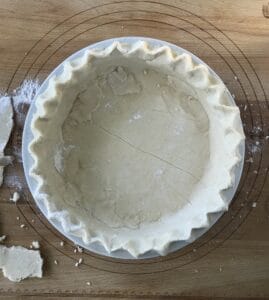
Step 11: Chill the pie dish in the fridge for at least 30 minutes and up to 1 day.
Step 12: Heat the oven to 350°.
Step 13: Line the crust with parchment paper. Fill the paper with pie weights, dried beans or small dry pasta noodles. Bake for 20 minutes, then remove the weights and paper and bake for another 8-10 minutes, until slightly browned. Cool completely.
For the Paleo pumpkin pie filling:
Step 1: Heat the oven to 350°.
Step 2: In a large bowl, whisk together the filling ingredients just until blended (make sure the water and cream in the coconut milk are well blended before adding to the filling mixture). Don’t whisk any longer than you have to so as to not incorporate too much air. This would cause the filling to rise too much and then sink, creating cracks.
Step 3: Pour the filling into the cooled pie crust and gently tap on the counter (picking up the dish an inch or so and dropping it on the counter) to let any air bubbles escape. Bake for 40-45 minutes, until the edges are set but the center is still slightly jiggly. Turn off the oven, crack the door open (I use a wooden spoon to keep it just barely open) and leave the pie in the oven for 30 minutes.
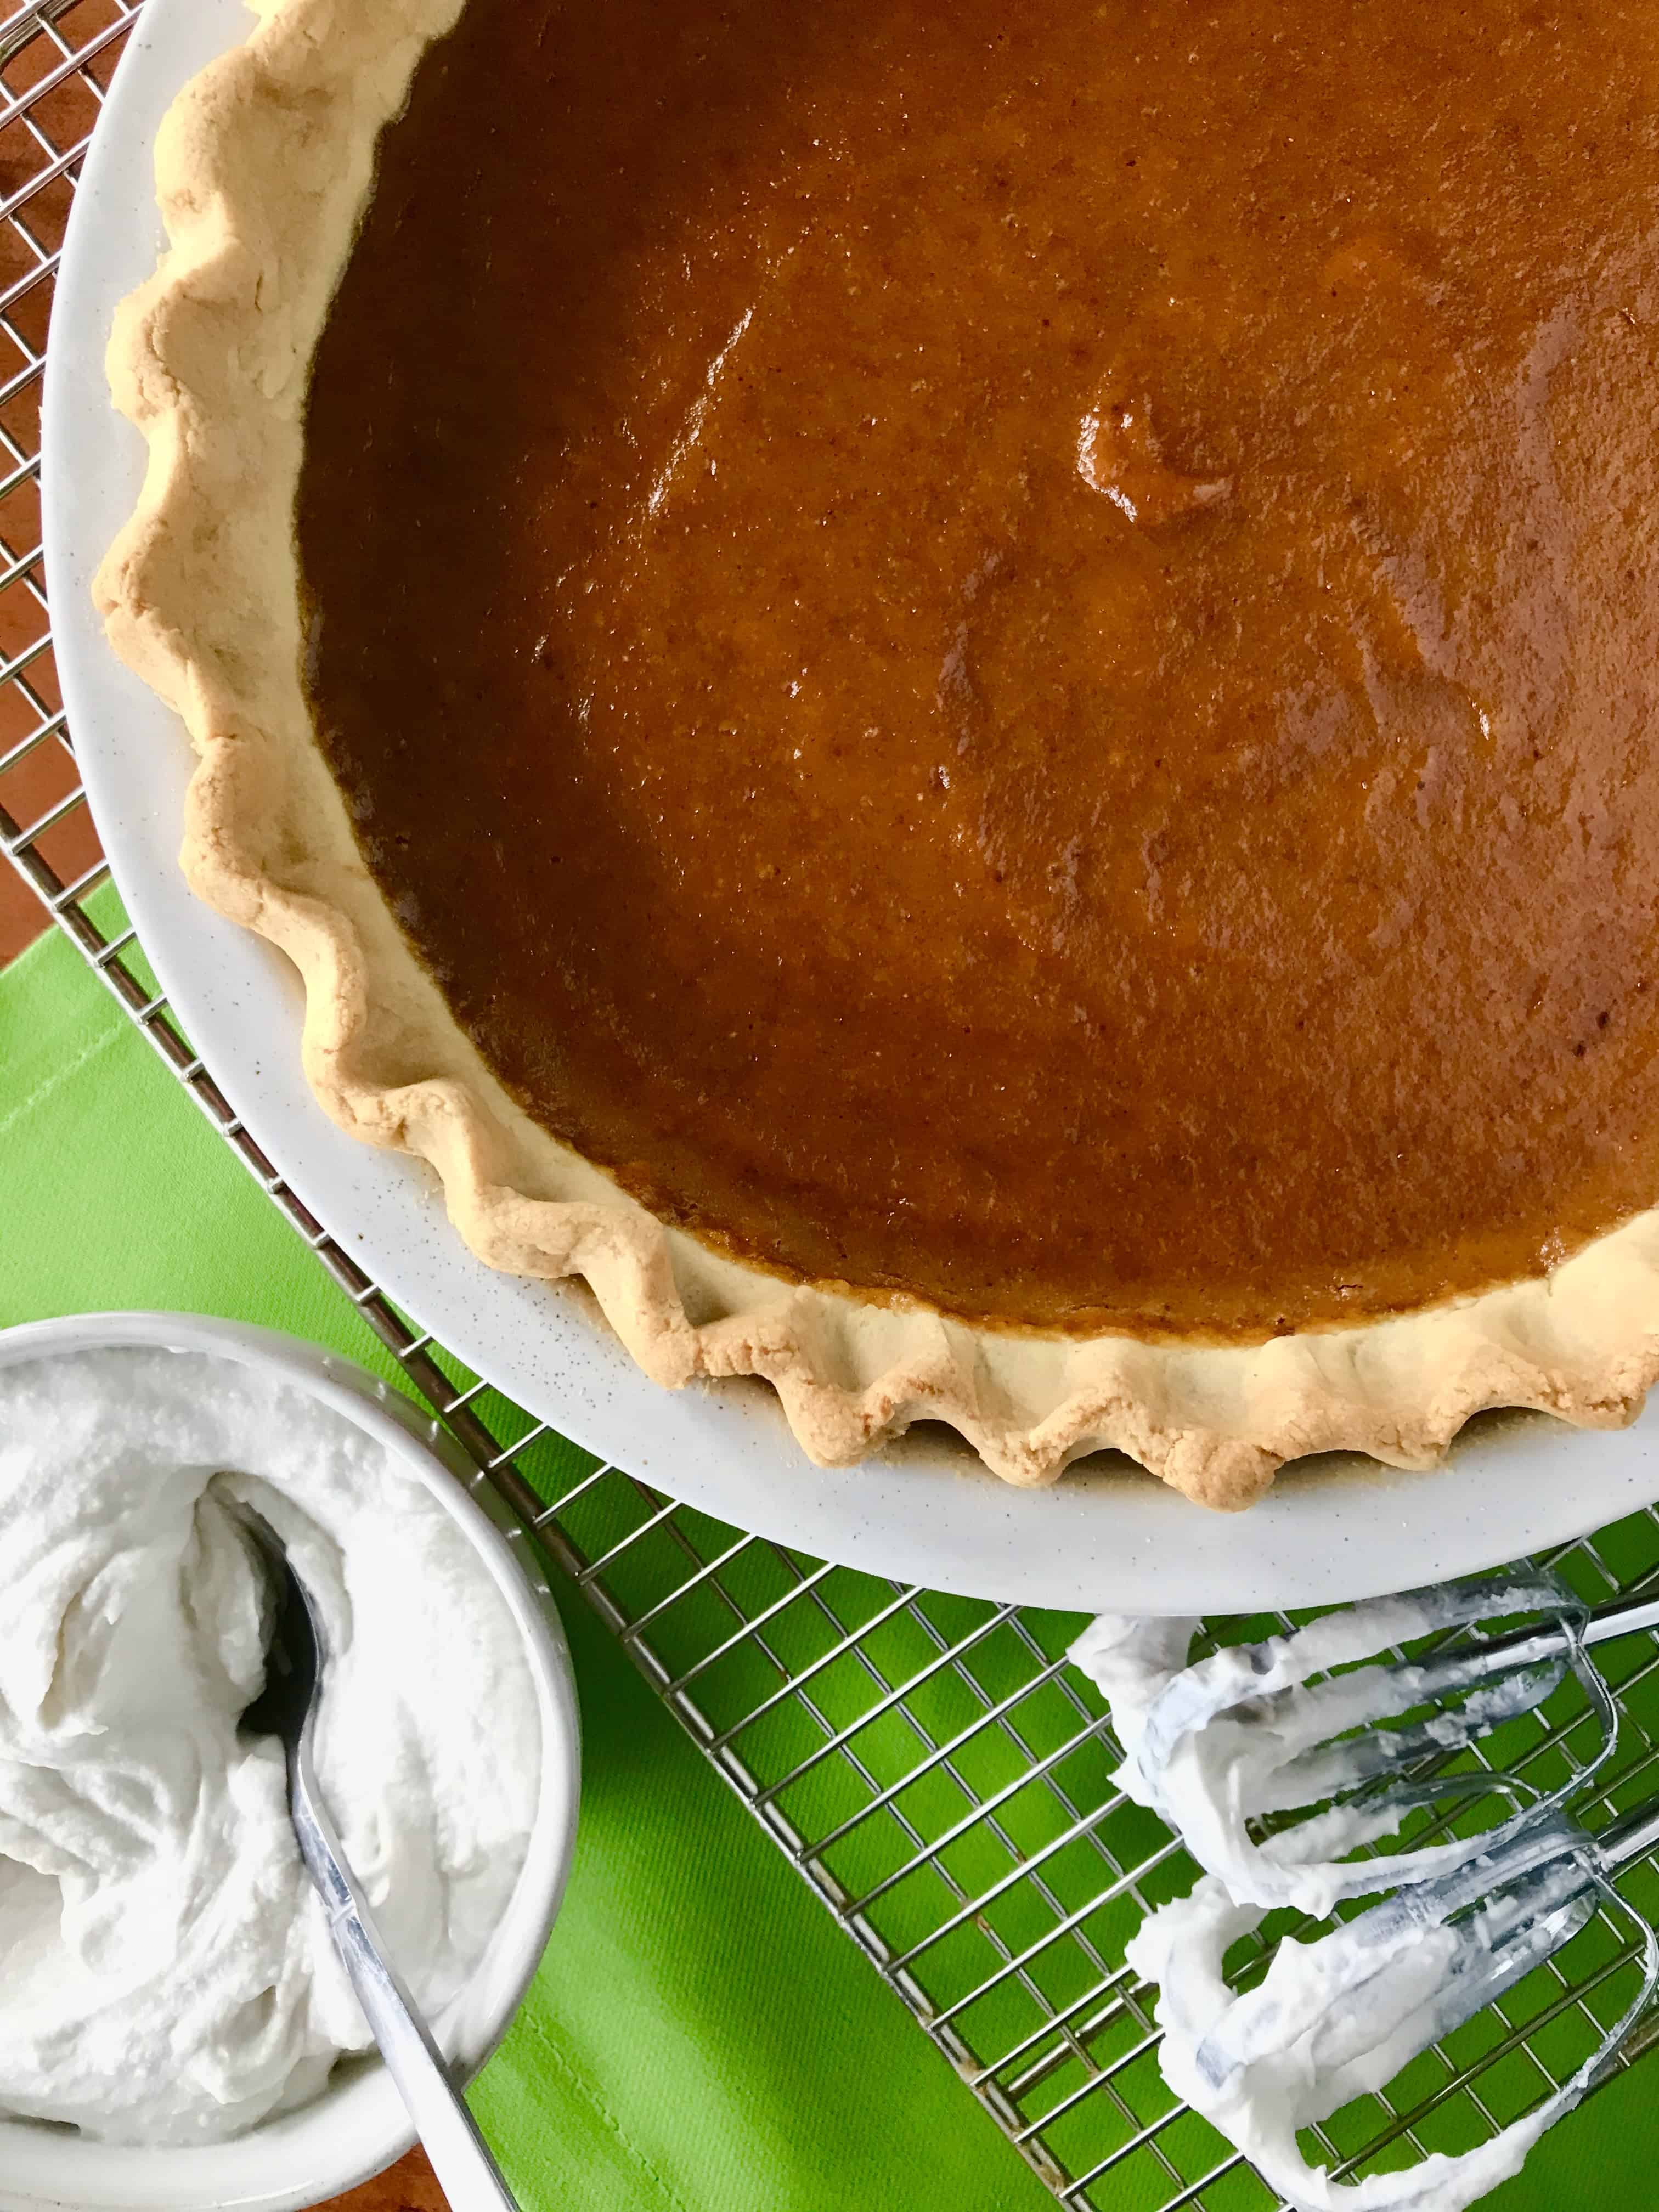
Remove and serve warm, room temperature or cold, with the whipped coconut cream, if using. This is best eaten the day it’s made.
For the whipped coconut cream
Step 1: Be sure to chill the coconut milk for at least 24 hours.
Step 2: Turn the cans over and open the bottom. Pour out and reserve the coconut water.
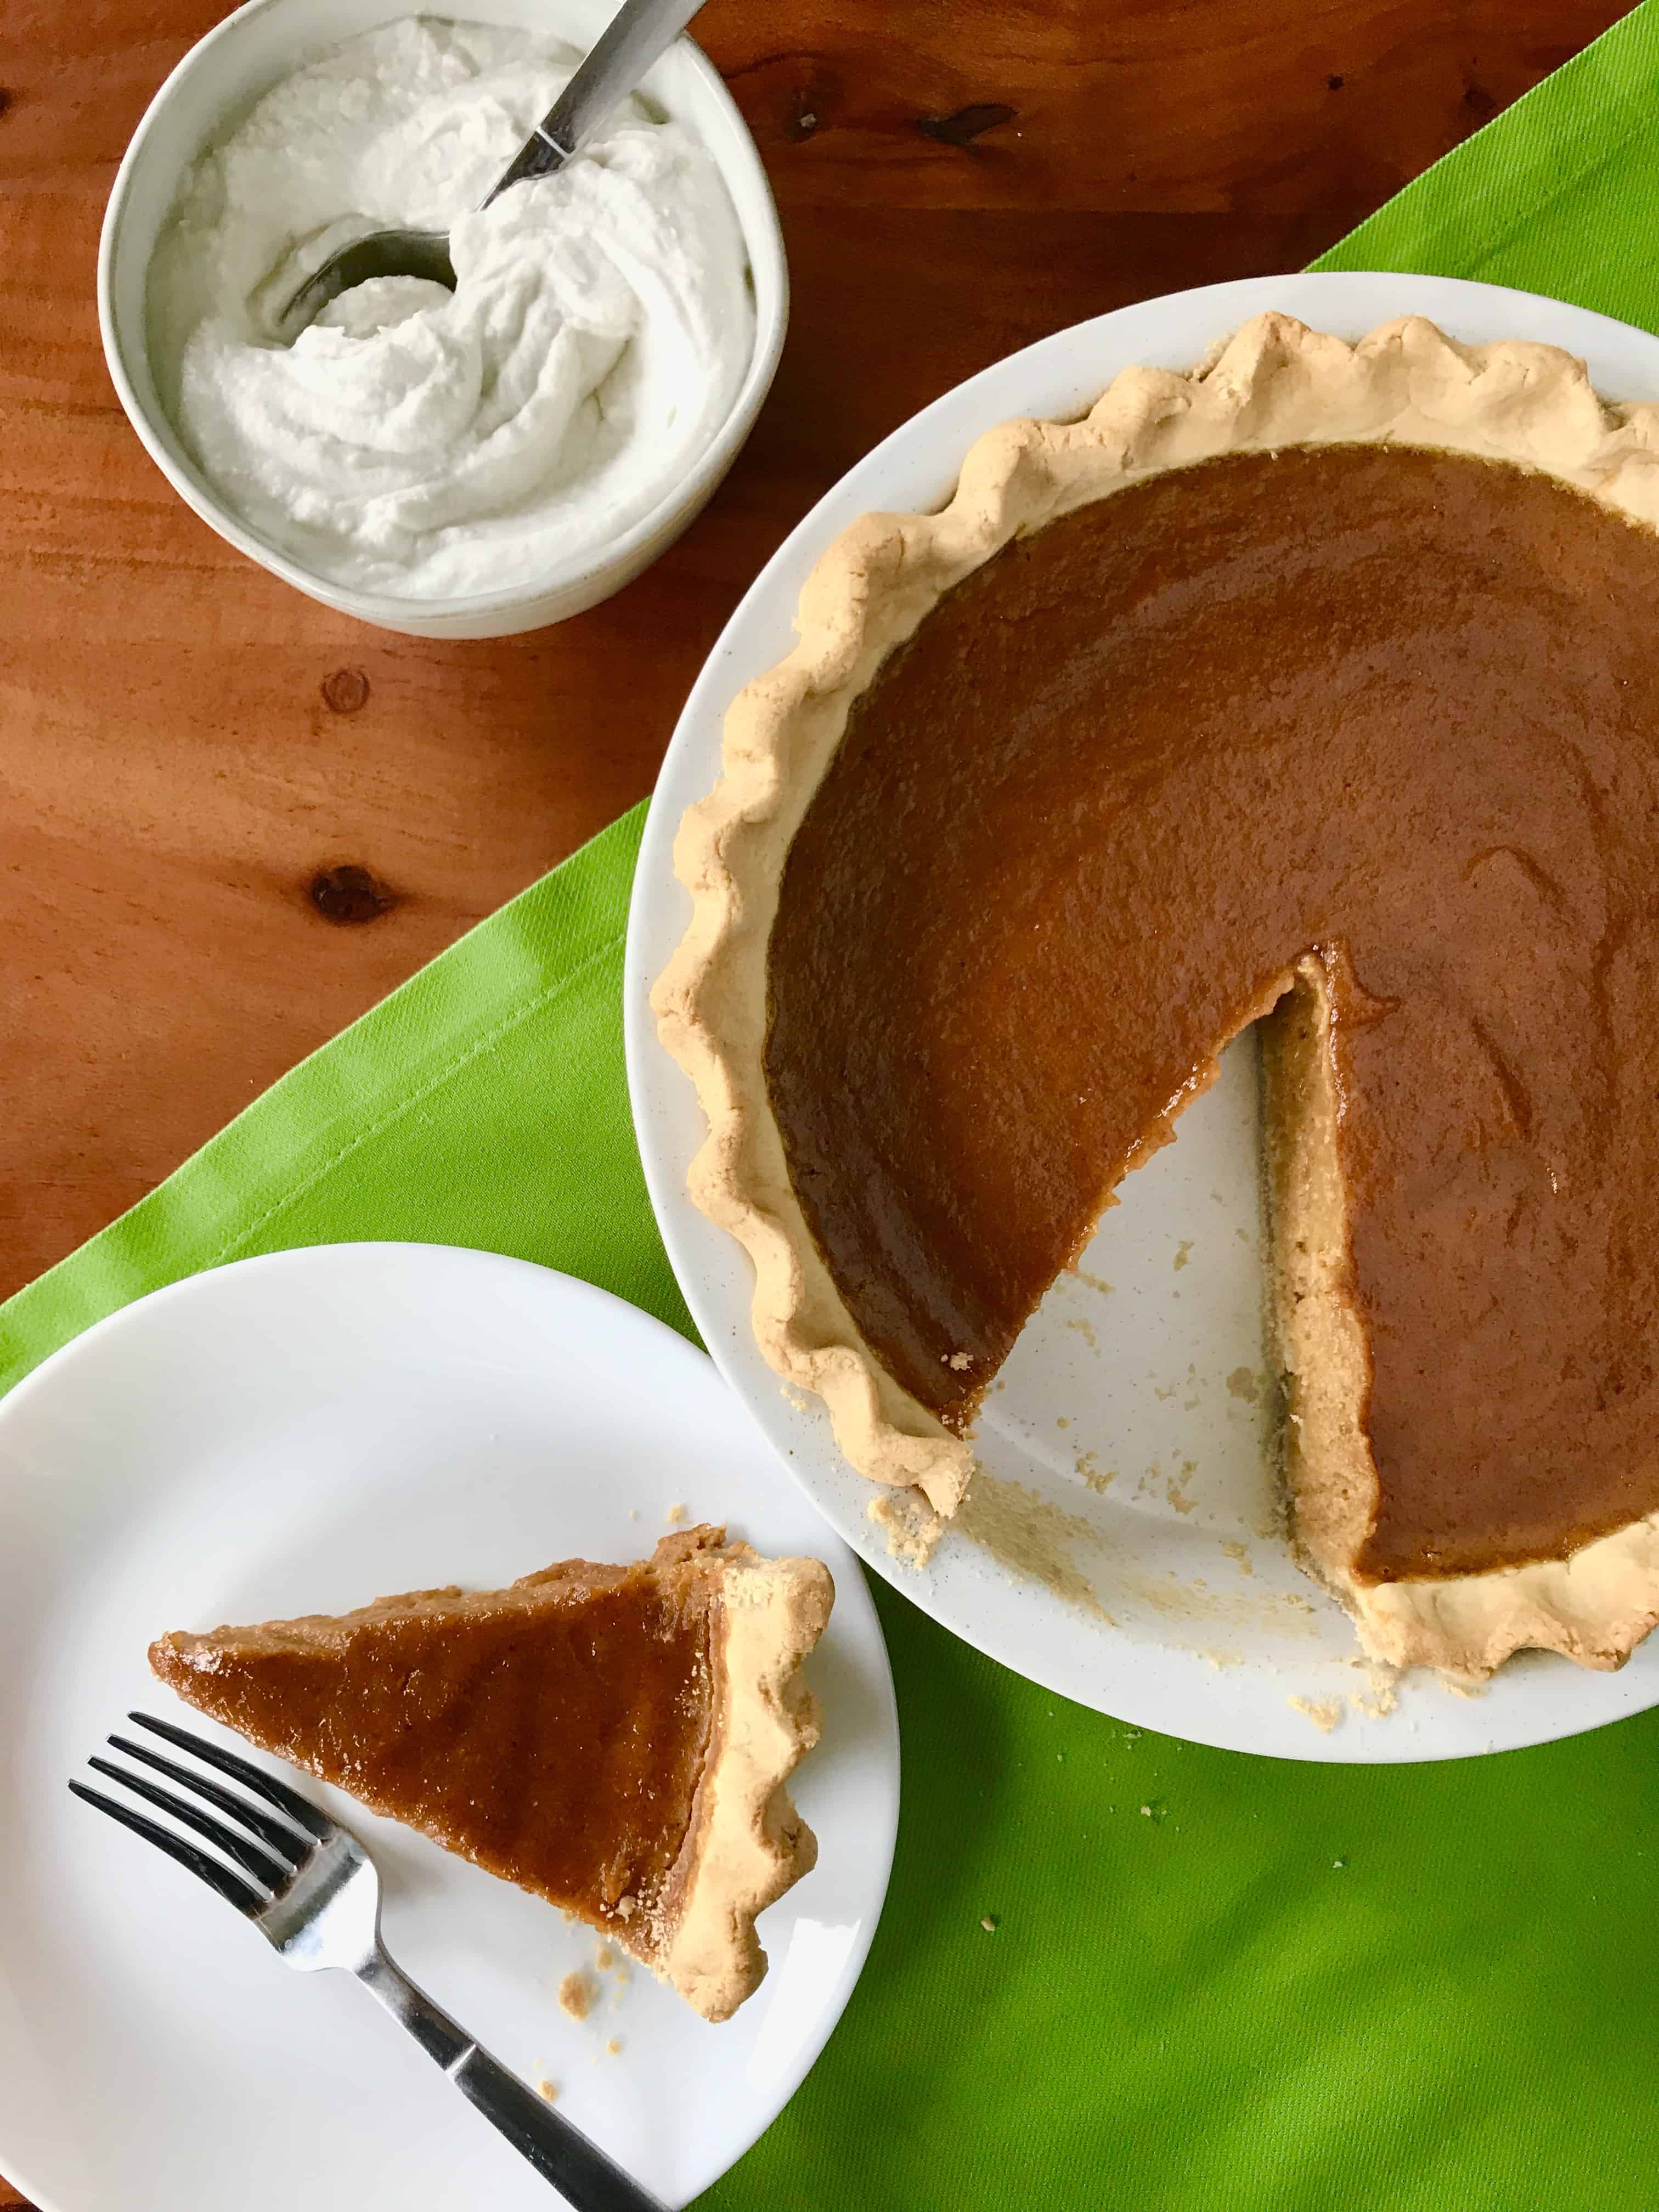
Step 3: Add the coconut cream to a medium bowl with 4-6 tablespoons maple syrup or honey and vanilla. Whip with a hand mixer, adding the coconut water 1 tablespoon at a time until it’s fluffy and smooth, approx. 2-3 minutes. I like to serve this separately so everyone can choose how much they want. Plus I don’t want to cover up the beauty of the pie (humor me, but it’s true).
Your Paleo pumpkin dessert is done
Pie is a project. Pie will always be a project. Since it does take a bit of time, I highly recommend baking the crust the day before for convenience.
However, I think the filling is best eaten the day it’s made so I would bake the pie earlier in the day before the turkey goes in the oven. Or, if there’s time, you can bake it once everything for dinner is out of the oven. Keep in mind that the pie bakes for 40-45 minutes and cools in the oven for 30 minutes.
Once you set this Paleo pumpkin pie out for dessert, with its mysteriously deep amber filling and cute fluted crust, no one will care what it contains or doesn’t contain. They’ll just be happy to eat it.
Other recipes you might like:
- Paleo Pecan Pie
- Paleo Pecan Pie Bars
- Paleo Pumpkin Bundt Cake
- Mini Salted Rosemary Rum Pecan Pies (gluten-free, dairy-free)
- Paleo Pumpkin Bread
- Paleo Pumpkin Streusel Muffins
Paleo Pumpkin Pie with Nut-Free Crust
Ingredients
For the crust (all at room temperature except for the palm shortening):
- 1 cup + 2 tablespoons cassava flour, plus more for for rolling out the dough
- 1 egg
- 2 tablespoons maple syrup
- 2-4 tablespoons water, depending on how much is needed
- ½ cup arrowroot flour
- ½ teaspoon fine sea salt
- ½ cup palm shortening, chilled
For the filling:
- 1 (15 oz. can) pumpkin puree (not pumpkin pie filling)
- 2 eggs
- 1 egg yolk
- ½ cup maple syrup
- ⅓ cup full-fat coconut milk (with the water and cream well blended)
- 1¼ teaspoons maple extract
- 1 teaspoon cinnamon
- ¾ teaspoon ground ginger
- ½ teaspoon fine sea salt
- ¼ teaspoon cloves
- ¼ teaspoon nutmeg
For the whipped coconut cream
- 2 (15 oz. cans) full-fat coconut milk, chilled for at least 24 hours
- 4-6 tablespoons honey or maple syrup
- 2 teaspoons vanilla
Instructions
For the crust:
- Cover a large cutting board with parchment paper and sprinkle cassava flour over the parchment.
- Whisk the egg and maple syrup together. Fill a measuring cup with the water. Set both aside.
- Whisk together the 1 cup and 2 tablespoons cassava flour, the arrowroot flour and the salt in a large bowl.
- Cut the chilled palm shortening into 1/2" pieces and add to the flours. Use your a pastry cutter (recommended) or your fingers to grind the shortening into the flour, breaking it down into smaller bits that are coated in flour. Since it's cold, you might need to use both hands to smoosh down the bigger pieces. You should have pea-sized pieces and smaller bits.
- Add the whisked egg and maple syrup and use your hands or a silicone spatula to squeeze and knead the egg mixture into the dough.
- Add 2 tablespoons of water and squeeze and knead the dough to incorporate the water. If necessary, keep adding the water, 1 tablespoon at a time, until the dough starts to come together. You're looking for something like play dough but still with just a few crumbs. If it's really sticky, add more cassava and arrowroot, 1 tablespoon each at a time, until it becomes more like play dough.
- Plop the dough (technical term) onto the floured parchment and press into a disc roughly 1" thick. Sprinkle on a bit more cassava flour and cover with another layer of parchment. (To wash your hands, use soap and the hottest water you can stand.)
- Roll out the dough until it's an approximately 12" circle. Start with the rolling pin in the center of the dough. Pressing gently, roll it away from you, then lift it back to the center to roll it toward yourself, the center and to the left, the center and to the right, and then the center and out diagonally into all 4 corners. Repeat the process until it's the right size.
- Carefully peel off the top layer of parchment. With your pie dish nearby, carefully slide your hand under the bottom parchment layer and quickly flip the dough over the pie dish, keeping it centered as much as possible. Carefully peel off the parchment. The dough might crack and break but that's okay! Gently raise the edges and tuck the dough down along the sides into the bottom. Use your fingers to pinch and press together any cracks. If you find that your fingers are sticking to and ripping the dough, fill a glass with warm water and dip your fingers in and then gently dry them so they're just damp.
- Pull off any large pieces hanging over the rim of the dish. Use the extra pieces to create a tall, thick layer around the edge of the rim (the dough will shrink a bit as it cools/bakes). You might not need all the dough. If you want, create a fluted edge by using one index finger to press the dough between the index finger and thumb of the other hand.
- Chill uncovered for at least 30 minutes and up to 1 day.
- Heat the oven to 350°.
- Line the crust with parchment paper. Fill the paper with pie weights, dried beans or small dry pasta noodles. Bake for 20 minutes, then remove the weights and paper and bake for another 8-10 minutes, until slightly browned. Cool completely.
For the filling:
- Heat the oven to 350°.
- In a large bowl, whisk together the filling ingredients just until blended (make sure the water and cream in the coconut milk are well blended before adding to the filling mixture). Don't whisk any longer than you have to so as to not incorporate too much air. This would cause the filling to rise too much and then sink, creating cracks.
- Pour the filling into the cooled pie crust and gently tap on the counter (picking up the dish an inch or so and dropping it on the counter) to let any air bubbles escape. Bake for 40-45 minutes, until the edges are set but the center is still slightly jiggly. Turn off the oven, crack the door open (I use a wooden spoon to keep it just barely open) and leave the pie in the oven for 30 minutes. Remove and serve warm, room temperature or cold, with the whipped coconut cream, if using. This is best eaten the day it's made.
For the whipped coconut cream:
- Be sure to chill the coconut milk for at least 24 hours.
- Turn the cans over and open the bottom. Pour out and reserve the coconut water.
- Add the coconut cream to a medium bowl with 4-6 tablespoons maple syrup or honey and vanilla. Whip with a hand mixer, adding the coconut water 1 tablespoon at a time until it's fluffy and smooth, approx. 2-3 minutes. I like to serve this separately so everyone can choose how much they want. Plus I don't want to cover up the beauty of the pie (humor me, but it's true).
Notes
Nutrition
For more recipes, inspiration and just good stuff, join me on:
Instagram,
Facebook,
TikTok
and Pinterest!


Lola says
I made this and split it into two mini-pies for my dad and husband to try and they both loved it! One of my younger cousins was diagnosed with Crohn’s earlier this year and pumpkin pie is one of his favorite things so I’ve been looking for recipes that will hopefully be easier on his body for Thanksgiving; SO looking forward to him trying this recipe this Thursday! Thank you so much for sharing!!
Paleo Gluten Free Guy says
So glad it worked for you! Thanks for sharing. 🙂
Michelle says
Wondering if I can replace the palm for butter, tallow or alternative oil
Paleo Gluten Free Guy says
Hi Michelle,
Butter or coconut oil should be fine. I haven’t baked with tallow so I can’t say for sure. If you use something besides palm shortening, please let me know how it goes!
Stacey Crawford says
That crust looks perfect & it is also dairy-free & nut-free. Magical!
Zuzana says
this is really great
Meredith says
Cassava flour for the win! What a delicious nut-free paleo crust – just perfect for pumpkin pie! I can’t wait to try it with other delicious pie fillings.
Jennifer Fisher says
I’ve never tried cassava flour for a crust . . . .really I’ve never tried any flour for crust because making one seems intimidating. But boom, bam — it was easy, thank you for the tips.
linda spiker says
Maple and pumpkin are such a great combo that you never miss the sugar!
Paleo Gluten Free Guy says
Exactly! Maple syrup >>> regular sugar.
Heather Harris says
This pie crust will be a perfect option for many!
Paleo Gluten Free Guy says
I hope so! 🙂
ChihYu says
I love this pie! It’s perfect! The delicious filling and the tasty crust!
Paleo Gluten Free Guy says
Thanks!
Jessica says
I never get tired of pumpkin pies! There are so many different approaches. It’s neat to see you use arrowroot flour, I’ve wanted to experiment with this ingredient but haven’t got to it yet. Now I know what to make!
Paleo Gluten Free Guy says
It definitely helps cut the cassava-ness of the cassava flour so you get a more neutral, flaky crust. Hope you enjoy!
Kari - Get Inspired Everyday! says
The texture of this pie looks like perfection, and I love that you have a nut free option too!
Paleo Gluten Free Guy says
Thanks! I felt the need to nail the texture. No cracks or craters here! 🙂
Raia Todd says
This pie looks absolutely perfect. I never thought to use cassava flour for the crust, I’m going to try it!
Paleo Gluten Free Guy says
Once I got the hang of it, I really like it!
Carol Little R.H. @studiobotanica says
It is indeed a healthier version! Thanks so much for this recipe! Looks delicious.
Paleo Gluten Free Guy says
Thanks!
Jean Choi says
My favorite Thanksgiving pie! Can’t wait to serve this over the holidays.
Paleo Gluten Free Guy says
Enjoy!
Joni Gomes says
Love that this recipe is nut-free! I personally love nuts but two of my family members have an allergy and I needed a recipe to bring to Thanksgiving! Will make your pie!
Paleo Gluten Free Guy says
Cool! Yeah, I love an almond flour crust but I wanted this to exist, too.
Erin says
Thank you for a paleo option that is nut-free! So helpful for dinner guests with allergies!
Paleo Gluten Free Guy says
You’re welcome! Yeah, I wanted to make something that both nut-eaters and nut-freers could enjoy. 🙂